Home » Electrician
Category Archives: Electrician
Safety Measures For Electrical Installation

You use the electrical wiring in your home or business to power lights, outlets, and other fixtures. You must follow local electrical standards and safety protocols when completing any electrical installation work.
Rewiring a building can be an expensive and labor-intensive process. Electricians will shut off the power and open up walls to remove old wires and install new ones.
Electrical wiring is the lifeline of modern homes, providing power to lights, appliances, and even charging devices. However, these wires can become dangerous without the right installation and maintenance. A qualified electrician will know exactly what is needed for a safe and secure home or business, ensuring the correct standards are met.
The main components of an electrical installation are the meter, circuit breaker box, and wires. The meter tracks the amount of power used in a building, while the circuit breaker box breaks up the electricity and directs it to various outlets and lighting fixtures. If any of these components are damaged, it is essential to call a qualified electrician to repair them.
An electrical installer may charge a flat rate for a particular service, such as installing a light switch or a new outlet. This method of pricing is convenient for customers and allows the electrician to set a price upfront. However, it is important to keep in mind that the costs of materials and equipment must also be factored into the final price.
Many electrical jobs require permits and safety inspections, which add to the overall cost of the project. The type of work needed will determine whether a permit is required. For example, rewiring an entire home will usually require a permit and inspections. Other projects, such as repairing an outlet or receptacle, are typically simpler and do not require a permit.
A professional electrician should always inspect any wiring for damage, faulty connections, and other issues before starting the job. They should also review local building codes, power distribution standards, and safety protocols to ensure that the project is safe and meets the necessary requirements.
When it comes to calculating the cost of an electrical installation, the main factors are the number of fixtures and the amount of wiring. Installing a single fixture can cost between $133 and $414, with more advanced fixtures costing up to $900. The cost of running the electricity to the fixture can also add up, as well as any other labor charges for moving and rewiring wires.
Wiring
A wiring system is a network of electrical wires that connect various accessories for the distribution of electricity from the supplier meter board to a variety of devices like lamps, fans and other appliances. It consists of one or more conductors, insulators and protective components. The wires used in domestic circuits are usually made of copper or aluminium-sheathed copper and are connected by means of regulating and safety devices. It is important to choose a wire that has been properly rated for the load and voltage requirements of your application. A wire with an incorrect rated conductor may cause a fire or short circuit. It is also important to pay attention to the color codes of the wires or cables, which indicate what each does.
A typical electrical wiring system consists of a main circuit, an earth and a neutral wire. The main circuit is connected to a breaker box that will break up the electricity into individual circuits. Each of these circuits will run to a specific outlet or fixture. This is what gives you the flexibility of switching on and off the lights, fans or appliances in your home or office.
Before you start, make sure that the power has been turned off and you have the correct tools to work safely. You should also wear rubber gloves and goggles to protect yourself from any potential shocks. It is also a good idea to use a multimeter to check the voltage of the wires before you touch them. You should never leave the ends of the wires hanging out of an outlet or switch. You should also put a wire connector over them for safety until you can install an outlet.
Wiring is an integral part of any home or commercial electrical installation. The electrical wiring system must be installed to the proper code and standard, so it is important to carefully consider the needs of your building before you start. This includes reviewing local building codes, power distribution standards and safety protocols.
There are several types of electrical wiring systems, including a loop-in system, porcelain cleat wiring, batten wiring and casing and capable wiring. Each type of wiring has its advantages and disadvantages, but it is important to follow the right practices when installing them. The most important thing is to keep your employees safe. Electricity is dangerous and direct contact with it can cause serious injuries or death.
Circuit Breakers
A circuit breaker is a switch that stops electrical current flowing through a circuit when it reaches dangerous levels. For example, if the blow dryer you plug in draws more current than the breaker is designed to support, it will trip and stop the flow of electricity to prevent fires, damage to equipment and other hazards. It also prevents overheating in the wiring. The breaker’s delicate sensors detect the amount of electric current passing through it and interrupt the flow of electricity when it exceeds its design limits.
Its contacts must be able to carry the load current without excessive heating & must be able to withstand the heat of the arc produced when the circuit breaker opens. The service life of the contact material is also limited by erosion from the continuous arcing during switching (opening). For this reason, miniature & molded-case breakers usually have replaceable contacts whereas power & high voltage breakers use a fixed-position contact.
When the contacts separate, the circuit breaker must quickly extinguish the arc to avoid any further damage. It does so by introducing artificial zero currents into the circuit through an LC circuit connected in parallel with the contact terminals. This reduces the fault current to safe levels and allows other circuit breakers to resolve it.
Once the arc is extinguished, the contact terminals must withstand the fault current until they can be closed to restore power to the circuit. This is done by using mechanical energy stored in the breaker’s spring or compressed air. Larger breaker systems may have solenoids or electric motors to power the mechanism and restore energy to the springs.
Once the breaker is installed, it’s important to test its functionality before turning on the power to the circuit. This will ensure that it works correctly and can safely handle the expected loads. It’s also a good idea to mark each breaker with its function in the panel directory. This will help in identifying the correct breaker when troubleshooting. Also, remember not to work on live electrical circuits, which can cause injuries or even death.
Outlets
Outlets are essential for providing power to appliances, lighting and other home electronics. If your outlets are outdated or damaged, it’s important to have them replaced by a professional. This will ensure that your home’s wiring is up to code and protect you from electrical failure or fire hazards.
There are a number of different types of electrical outlets available to choose from, including duplex receptacles, GFCI outlets and surge suppression outlets. These outlets are designed to meet specific safety requirements for different areas of your home, such as kitchens or bathrooms. GFCI outlets provide extra protection against electrocution by shutting off power immediately when there is a problem, reducing the risk of serious injuries. Surge suppression outlets help protect against damage from overloaded circuits.
Before installing an outlet, it’s important to turn off the electricity at your home’s main service panel. This is usually located in a utility room, garage, basement or closet. You can also use a non-contact voltage tester to verify that the power is off. Once the electricity is turned off, you can begin by removing the old outlet and securing the new one to the electrical box with mounting screws. The next step is to connect the pigtail wires to the circuit wires. It is important to have 6 or 7 inches of each conducting wire extending from the electrical box. If the cables are longer, you’ll need to cut them using wire cutters or a knife.
When connecting the pigtails to the circuit wires, make sure that you don’t touch any exposed metal parts of the electrical box or terminal screws. This is a common cause of electrical malfunctions, which can result in fire or injury. Once the connections are made, wrap the wires with electrical tape to prevent them from touching each other.
While you can do a DIY outlet installation project, it’s best to leave this type of work to an experienced electrician or handyman. If you’re unsure of how to safely complete an electrical project, don’t hesitate to ask for advice. An improperly completed electrical project can lead to serious injury or even death.
Generator Installation Tips for Homeowners
The generator must be installed outdoors because it produces carbon monoxide, a colorless and odorless gas that can build up to deadly levels in just a few minutes. It should also be at least 20 feet from any building openings.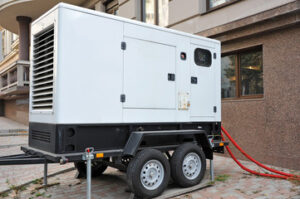
A level concrete pad must be poured to keep the generator away from dirt and water. The contractor will get permits and work with your county and city to make sure the installation meets code. Call Us Today for more details.
There are a few things that affect generator installation costs. The type of generator you get is one factor, as are the size and fuel source. Natural gas generators tend to be the most affordable, while propane or diesel models cost more. The amount of power you need also has an effect on the final price, with larger generators generally being more expensive.
Another significant cost is the installation of a transfer switch, which automatically sends power to your generator when the utility fails. This is a must for all whole-house generators, and an electrician will need to install it in your home. This can add to the total cost of your project, as it can run up to $5,000.
A transfer switch can be installed in your breaker panel or in an electrical subpanel, and it will redirect all the circuits in your home to the generator when there is a power outage. Having a subpanel can help prevent the generator from overloading your home’s main electrical panel, and it can also make it easier to repair any problems that arise in the event of a power outage. In some cases, your electrician may recommend installing a subpanel as part of your generator installation.
The location of your generator can also impact the overall cost. Ideally, the unit will be located close to your home’s gas and electric meters. This can reduce the distance that the gas and electrical lines must travel, which can lower your installation costs.
If you’re unsure of what type and size generator to purchase, a professional survey will help determine your needs. The survey will look at each item in your home that will need to be powered by the generator and calculate its wattage usage. The results will give you an idea of what size generator to buy and how much it will cost to operate it during a power outage.
Once you’ve chosen the right generator for your home, the final step is to have it installed. The generator will need a permanent resting place, and most professionals prefer to install them on a poured concrete pad. This will reduce vibration, increase airflow, and protect the generator from corrosion. The cost for this is typically $50 to $75 per square foot, including site preparation and concrete pouring.
Size
A generator provides power during a power outage, but the size of the generator depends on how many appliances and devices homeowners want to run. The best way to determine the correct generator size is to make a list of all the items that you want to be powered during an outage. Then, take note of their wattage requirements. This will help the contractor recommend an appropriate generator size for the home.
Generally, most homes need between 5,000 and 7,500 watts to power their basic electrical needs during an outage. This may include a refrigerator, sump pump, window air conditioners, and basic lighting. A larger generator is usually recommended for large homes and homes that are very dependent on electricity, such as those with well systems or electric water heaters.
When calculating wattage, it’s important to know the difference between kilowatts and kilovolt-ampere (kVA). kW is used to measure the actual power that a device produces, while kVA measures apparent power. It’s also helpful to understand how the wattage of an appliance changes with usage. For example, the starting wattage of an appliance is often 2–3 times higher than its running wattage.
Another factor that will affect a generator’s capacity is the type of fuel it uses. Most residential generators use either propane or natural gas. Propane generators are more expensive than natural gas generators, but they offer greater reliability and flexibility. The contractor will be able to discuss the pros and cons of each option with the homeowner and help them choose the right fuel type for their home.
If a homeowner prefers to estimate the size of their generator, they can find a wattage calculator online and add up the total wattage of their appliances and devices. Alternatively, they can visit their local hardware store and ask for assistance. Some homeowners may also wish to consider staggering the use of certain devices or unplugging appliances that aren’t essential during an outage.
Regardless of which generator size is chosen, it’s important to keep in mind that a generator must be placed a minimum of three feet away from any flammable materials. Additionally, a generator should never be operated indoors. This can produce dangerous carbon monoxide that can poison the family and cause fires or explosions.
Installation
Most municipalities require a permit to install a generator. When you choose a licensed electrical contractor to handle your installation, they should take care of all the paperwork and submittals for you. This means you’ll be able to avoid delays and get your generator installed on time.
Before starting on your generator project, it’s important to determine how much power you need. To do this, you’ll need to consider your appliances and what essential services you use during a power outage (e.g., sump pump, basement air conditioning, and refrigerator). You’ll also want to consider your home’s overall load capacity, which is the total amount of power the house uses in a typical day.
Next, you’ll need to decide where the generator will be placed. A good place is near your home’s gas or electric meter. This will minimize the distance that your generator needs to travel for fuel and power.
A licensed electrician will perform a site survey to make sure that the proposed location of your generator is safe. This is to ensure that the generator doesn’t interfere with your home’s breaker box or backfeed electricity into the grid. This can be dangerous to utility workers trying to restore your power, as it could cause a fire or electrical shock.
Depending on the type of generator, a transfer switch may be needed to ensure that the power produced by the generator only powers your essential circuits during a power outage. These switches can be as small as a subpanel that’s powered by the generator, or they can be whole-house transfer switches that connect your existing breaker panels to the generator’s power.
Conductors and control wires are then run from the transfer switch to the generator, with a shut-off valve and drip tee installed ahead of it for emergency service and maintenance. If you’re using a natural gas generator, a buried gas line will be run from your gas meter (or another point close by) to the generator. This will include a pressure regulator to maintain a constant flow of gas, as well as a shut-off valve and drip sleeve for safety.
Maintenance
There are a number of maintenance tasks that must be performed on an ongoing basis to keep your generator running smoothly and effectively in the event of a power outage. These tasks may include testing the generator and checking its components. Some of these tasks can be done by homeowners, while others require the expertise of a professional technician. These professionals can also perform a more extensive diagnostic check on your generator.
Some of these tasks may be done on a daily basis, while others are best done on a weekly or monthly schedule. It is important to follow the user manual closely for your specific generator model, as there are different maintenance procedures for each one.
It is recommended to use the same generator fluid (engine oil) that was recommended by the manufacturer. This will help your generator run more efficiently and ensure that all internal parts are working properly. In addition, it is important to have your generator properly fueled, and this should be done regularly. This includes a visual inspection of the tank, and it is also advisable to have a licensed professional inspect and flush the fuel system.
The generator must be kept on a flat, solid surface that is protected from extreme weather conditions. It should be located away from any combustible materials that could cause a fire. It should also be positioned on a pad that is large enough to allow for proper ventilation. If a generator is placed on bare ground, it will eventually sink into the soil. Brothers always installs concrete pads for the generators they install to make sure that the generator is not overly impacted by the ground it rests on.
The internal combustion engine of the generator produces carbon monoxide, a deadly gas that can be inhaled. It is essential to have the generator regularly inspected for carbon monoxide leaks by a licensed professional. In addition, the user manual may also recommend a regular yearly test and load test to ensure that the generator will be ready when you need it most.